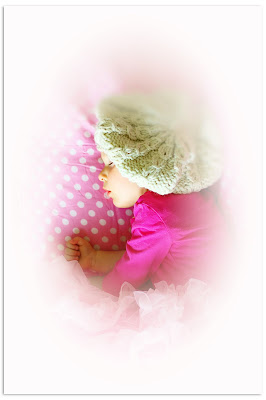
![](https://blogger.googleusercontent.com/img/b/R29vZ2xl/AVvXsEicul5JBwGzh_b4QgKfuKsvub8pUZ7pWg9iR8LOM78dBYCuGFeEdPQ0_rbvB2JcJi3R3_J7P05Dv6ZP_IsbJ27Bs3l-y8-ZFQkW7FaXWyaIK9uAN_G9-_n3YI58lWBbuwqJnEaXhbuaUsGO/s400/IMGP9133.jpg)
1. add new layer on the top of your picture
2. fill it with the white color using paint bucket tool
3. lower its opacity to 60 % - so that you could see your picture
4. using round soft eraser ( 100% opacity) erase top white layer in places you want to be visible (face)
5. change white layer opacity up to 100% and erase more areas with smaller eraser size for more details (hair, neck)
6. flatten image - save as jpg.;)
another egzample
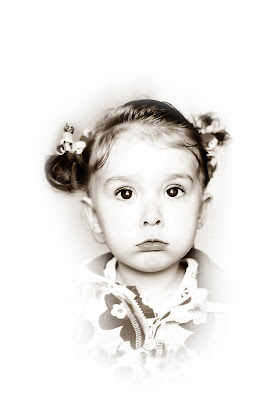
![](https://blogger.googleusercontent.com/img/b/R29vZ2xl/AVvXsEhi2-1L-GOSzMSjsroApWeF93wlRf1LjFQqSGStGiD252lZE3tOYyslhjUA76Lfq2mRm0OGkBGF0RtlWXXUgs6pOiAbAGklBr02CASYUOzMVqSg4XM0V_N6aavCAvPqXjR-YKlG8MD-CcQS/s400/IMGP93022.jpg)
form this pic
![](https://blogger.googleusercontent.com/img/b/R29vZ2xl/AVvXsEi0so5KOdYnOZnb5nT-WA_A9XZ3leqwu0xZRvSveezv0jFpT-HoLwmWfbI-MHQZYkU58u3vPMlrorL67kSyN_W44ADS0vh6cdpKGFpCAr6kQ_EddTsCcknNHbIuk_AzPSzdl_ClTMqLRpfV/s400/IMGP9302.jpg)
click on the pic for larger view
![](https://blogger.googleusercontent.com/img/b/R29vZ2xl/AVvXsEgIBrCM_Is9jDeGnDuDStmpKSbe2E-HRTCezhYLS7em33JDnGsaA5gae95Rqo7b-G7CeMmFEzQr2HZWqwRG2WigQnTASorehvb_t3RL0zomQw0c2VsU6GwugDpYHG3n0BYpxqY1j2Ubn6rD/s400/tut.jpg)
2 comments:
thanks for the tutorial. I like that look.
Kim
Love it! Thank you very much!!!
Post a Comment